


Setting up TestFlight Beta Testing in iTunes Connect
TestFlightApp—a company which we loved to use for beta testing our IOS software—was bought by Apple, which has tried to incorporate similar beta-testing features into their iTunes Connect portal, in a new feature called TestFLight Beta Testing.
Getting setup is a bit confusing, but once setup, the experience for the beta testers is seamless.
One confusion in the setup is that TestFLight Beta Testing differentiates between internal and external testers. Internal Testers are limited to 25 people, who must be added to your iTunes Connect account with Technical or Admin roles. You may register up to 1,000 External Testers without adding them to your iTunes Connect account. The problem with External Testers, is that your App must be reviewed by the Apple reviewers before going out to your External beta testers.
Since for our purposes, 25 testers is adequate, we are describing here how to setup an App for Internal Testers.
Developer Instructions:
- Use the Apple Developer Center to register a new Bundle Identifier for your App, if it doesn't yet have a unique bundle id.
- Use iTunes Connect to create a new IOS App, with a unique name, and specify the Bundle Identifier from the last step.
- Build, and upload your app as usual, using the "Project → Clean, Project → Build, Project → Archive" sequence.
- Once your App has been uploaded, it will appear in your Application list in iTunes Connect.
-
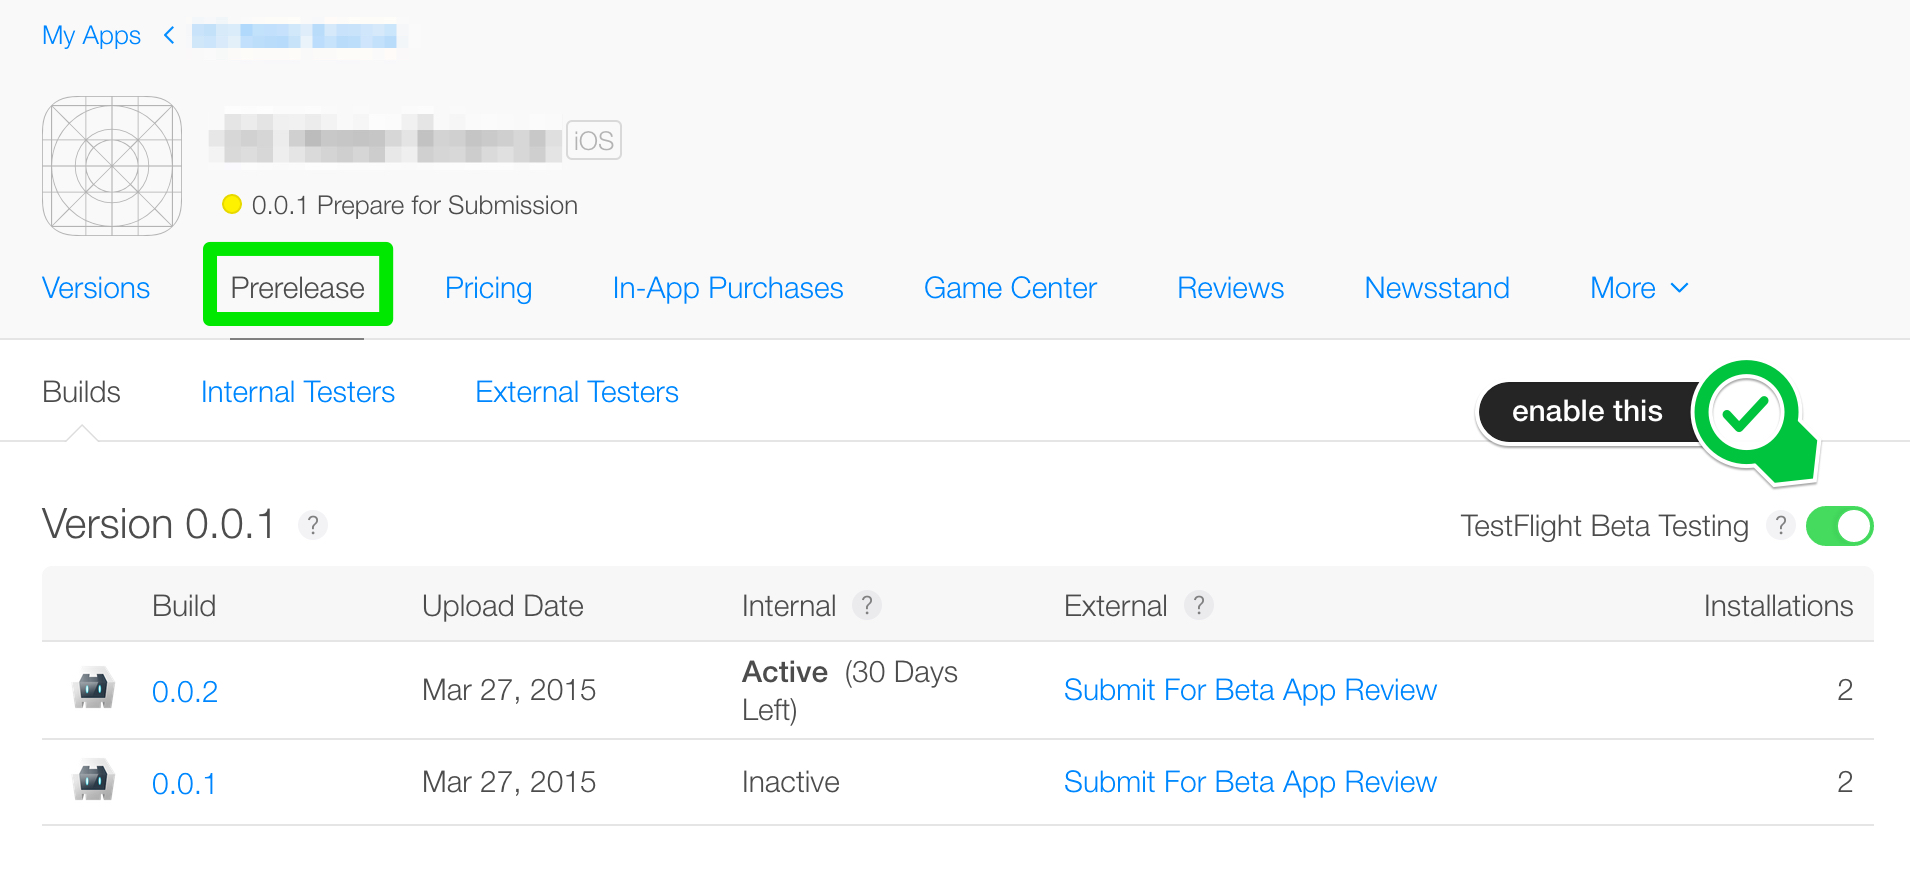
Select the Prerelease tab, and enable TestFlight Beta Testing.
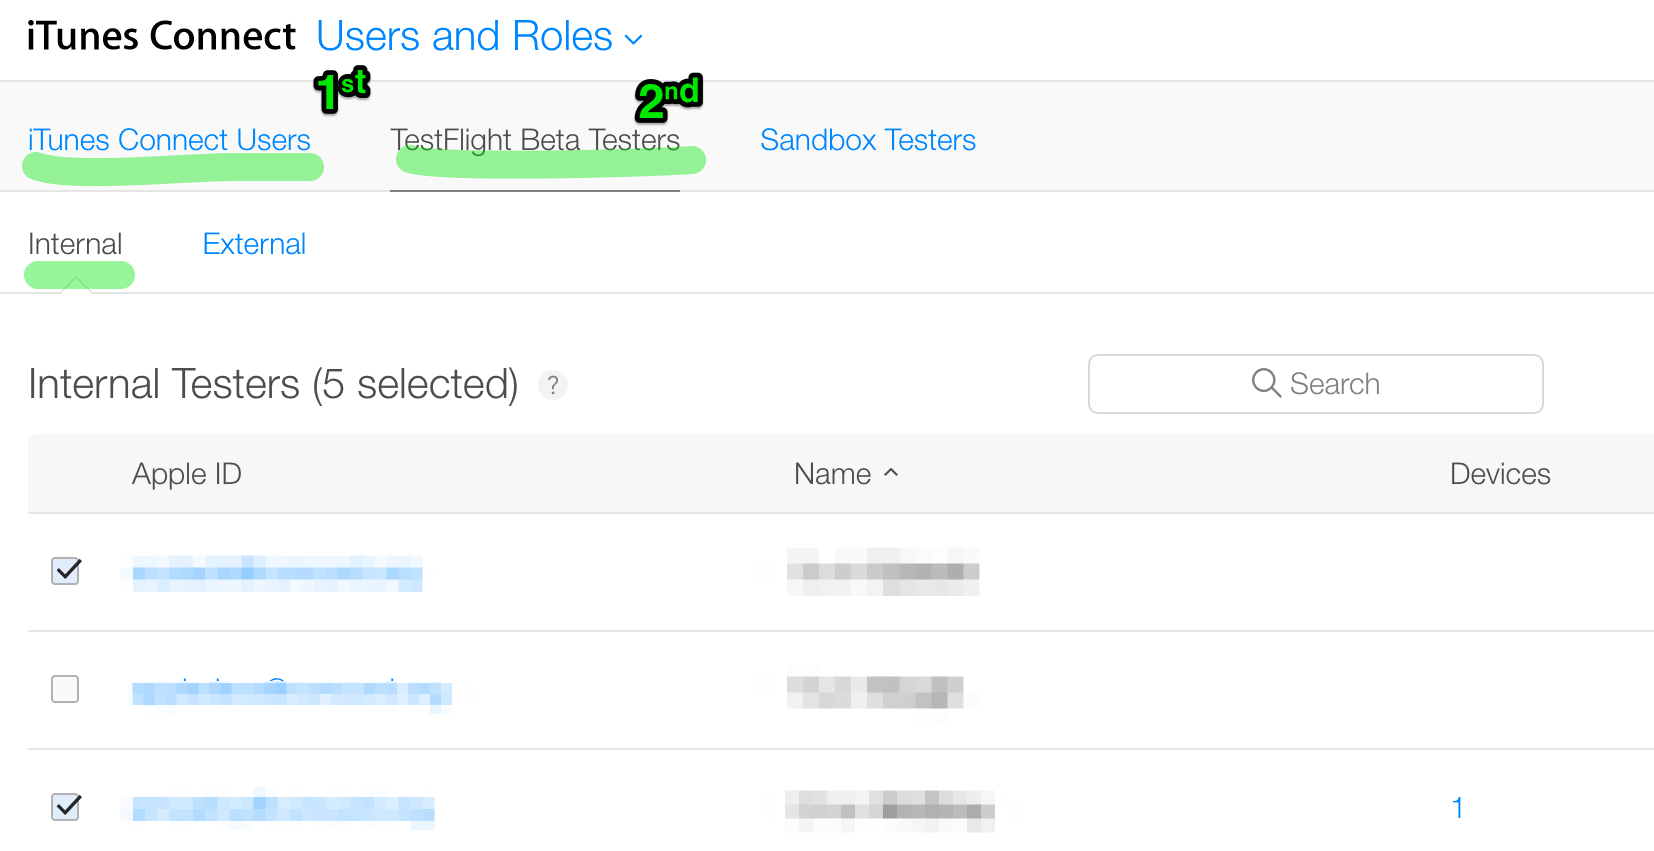
- Add your Internal Testers using the iTunes Connect dropdown menu, and selecting Users and Roles. You have to add them to iTunes Connect Users first. Be sure that the registered users have the Technical role selected. After they have verified their accounts, you will need to come back, and add these users to the TestFlight Beta Testers tab, as Internal Testers.
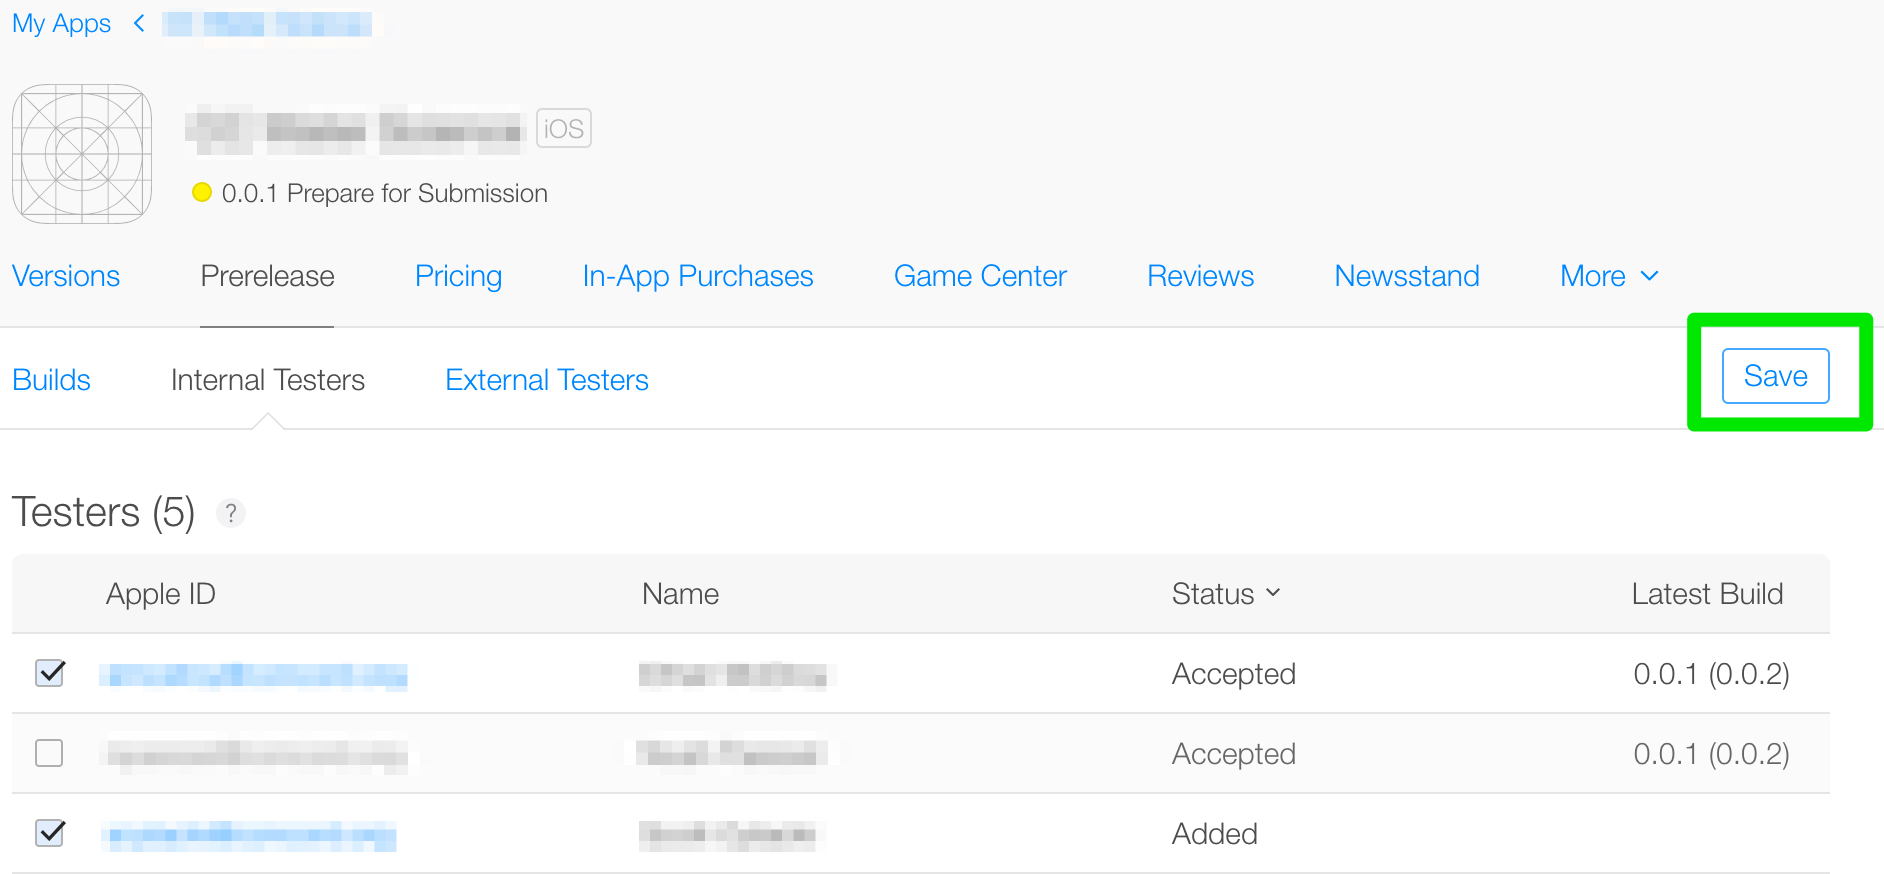
- Head back to your App page, and select the Internal Testers tab of the Prerelease Tab. You need to choose your testers for this app here after they have been configured in the Users and Roles After selecting the checkboxes, remember to click the Send Invitations button! (the Save button in the following screenshot):
Beta Tester Instructions.
- Install the TestFlight app from the IOS App Store.
- You will receive an email from Apple an hour or so after the developer has invited you. The email will have a link to iTunes Connect, and it will ask you to verify your email, and create an account password. You will want to remember this password.
- A few hours after you have verified your account, you should receive a second email from Apple with a direct link to open the beta application. Its important to open this email in the mobile device that has had TestFlight installed.
Subsequent Builds
The good news is that after the initial setup, testers can be automatically notified of subsequent builds if push notifications are enabled (recommended). The workflow for both the developer and the tester is much smoother from this point on.